Configuring Image Enhancements and Processes in Standard Mode
Image enhancements improve the accuracy of OmniPage OCR. The type of enhancements that should be used depend on the image. Enhancements and processes increase scanning duration.
Ordering Enhancements and Processes
Enhancements and/or processes are performed in the vertical order
in which they appear in the Scanning Explorer Pane. This order can dramatically affect
the results of a scanning session, as an enhancement or process will always affect the following enhancement or process. OmniPage OCR should be performed after image enhancements in most situations.
 Show me a correct example.

Show me an incorrect example.

Example: A scanning session utilizes the Deskew image enhancement and the OmniPage OCR process. Deskew would only enhance OCR if it is performed before OmniPage OCR.
Applying Image Enhancements
- Select the Image Processing node in the Scanning Explorer Pane.
- Select and configure one or more enhancements and/or processes in the Document Properties Pane:
Border Padding: Adds a white border around an image.

Note: After Border Padding is performed, an image's size will increase. This enhancement does not scale or change
the resolution of an image.
- Select Border Padding and then specify the pages this enhancement will be applied to.

- Click Next: Select Region.
- Specify the amount of padding (in pixels) you would like added to each side of the image. If zero is entered, no spacing or border will be applied.

-
Click Finish.
Border Removal: This image enhancement removes one or more borders from an image. It does not scale or change the resolution of an
image.
Tip: This enhancement should be performed before Color Removal and Invert in a scanning session.
- In the configuration wizard, specify the pages this enhancement will be applied to.
- Click Next: Border Selection, and specify which borders will be removed.

- Crop white borders: The white border surrounding content will be cropped, reducing the
image's size. Each side of the image will be cropped up
to where the first black or color elements are found

- Crop black borders: Black borders will
be cropped, ending where the first white elements are found and reducing the image's size. If this option is used for a
black and white (1-bit) image, any remaining black borders will be filled.

- Fill black borders: Black borders that touch the edge of the image will be inverted to white. This option is only supported
for black and white images.

- Click Next: Sensitivity. Stray marks (e.g., speckles
and smudges) can affect the accuracy of border detection. To compensate, define a sensitivity level (in pixels).

- Low: Border
detection will be less sensitive. Designed to detect larger borders.
- High:
More sensitive. Designed to detect smaller borders.
- Click Finish.
Color Removal: This image enhancement converts color or grayscale images to black and white, reducing the image's file size.
Note: This enhancement was formerly known as Dynamic Thresholding.
- In the configuration wizard, specify the pages this enhancement will be applied to.
- Click Next: Select Region, and define the area that should be converted: the Entire Page or a specific Region.
Tip: Limiting the conversion to a region protects the quality of illustrations while optimizing text for OmniPage OCR. Show me how to define a region.


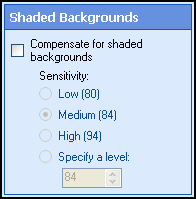
- Select Next: Shaded Backgrounds.

- Optional: Compensate for shaded or non-uniform backgrounds. The lower the sensitivity level, the less affect shaded backgrounds will have.
- Select Next: Image Contrast, and define how dramatically the image's contrast will be modified.

- Click Finish.
Color Smoothing: This image enhancement averages the background color
of an image, reducing the number of colors used and the image's overall file size. Color smoothing also optimizes an image for Color Removal.
- In the configuration wizard, specify the pages this enhancement will be applied to.
- Click Next: Select Region, and specify a region of the image (in pixels) that will establish the average background color.
The image's overall background will average to this color. The foreground (i.e., the image's actual content, such as text) should not be in
the region specified.


- Select Next: Background Color Variation.
- Specify the amount (as a percentage) that a pixel's color can vary from the average background color and still be converted.
Example: If a pixel varied by 25% from the average background color defined in Step 5, it would not be converted.

- Click Finish.
Crop: This image enhancement removes an outer portion of an image, reducing the image's overall dimensions and file size. The unremoved portion remains at the same scale and resolution.
Note: This enhancement is
performed regardless of content, potentially removing important
data.
- In the configuration wizard, specify the pages this enhancement will be applied to.
- Click Next: Crop Options.
- Define the region to be removed (in pixels). If
zero is entered, the side in question will not be cropped. Show me an example.


- Click Finish.
Deskew: This image enhancement straightens images that have been scanned at an angle.

Note: This enhancement may change an image's width and height. If so, the image will be resized to preserve all data.
- In the configuration wizard, specify the pages this enhancement will be applied to.
- Click Next: Skew Detection, and specify a method to determine how skewed an image is.

- Lines: Estimates using the
degree by which lines run parallel to the corresponding image border.
- Text: Estimates using text. Text must run left to right.
- Angle:
Estimates using the foreground. Can be optimized for speed or accuracy.
- Click Finish.
Despeckle: This image enhancement removes unwanted marks (e.g., dots or stray pixels) from scanned documents.

Tip: To
remove marks touching the content of an image, use the Smooth enhancement's Sand And Fill feature.
- In the configuration wizard, specify the pages this enhancement will be applied to.
- Click Next: Speckle Size, and specify a Noise Level to configure the maximum size of the noise to be removed. Size is specified as both width and height. For example, setting this option to 2 will remove all noise that is equal to or smaller than a 2 pixel x 2 pixel square.

- Select Next: Character Protection.
- Optional: Enable Character Protection to prevent valid characters (e.g., commas and colons) from
being removed.

Note: Speckles that are adjacent to valid characters
will not be removed.
- Click Finish.
Invert: This image enhancement reverses the colors present on an image. This process can be useful for converting white text to black, which is more conducive for OmniPage OCR.

- In the configuration wizard, specify the pages this enhancement will be applied to.
- Click Finish.
Line Removal: This image enhancement removes horizontal or vertical lines from scanned images.

- In the configuration wizard, specify the pages this enhancement will be applied to.
- Select Next: Line Orientation, and specify whether horizontal or vertical lines will be removed.

Tip: To remove both, add an additional Line Removal enhancement to your scanning session.
- Select Next: Minimum Line Size, and define the smallest line that should be removed by specifying the minimum number of pixels printed in a row (vertically or horizontally, depending on your selection in Step 5). Lines equal to or larger than
the specified size will be removed.
Example: Selecting Short (75) removes all lines 75 pixels or longer in length.

Select Next: Maximum Line Thickness, and define the maximum thickness (in pixels) a line can reach and still be removed.
Example: Selecting Thin (10) removes all lines that are 10 or more pixels thick.

Select Next: Maximum Line Gap, and specify the maximum amount of space (in pixels) that can exist between two line
segments. Segments separated by more space than the size specified will not be removed. This option compensates for lines that have been fragmented due to a poor-quality image.

Select Next: Excess Line Cleanup. The area surrounding a poor-quality line often contains stray marks. This option defines a region (in pixels) around the line from which stray marks will be removed.
Example: Selecting Medium (2) removes all stray marks located within two pixels from a line.

Select Next: Character Reconstruction. Characters that intersect lines may be damaged during line removal. This option repairs any damaged characters. Specify
the maximum reconstruction width (in pixels).

Tip: If damaged characters are not properly repaired after processing, select a higher value. If characters are improperly repaired, select a lower
value.
- Click Finish.
Resize: This image enhancement scales an image to be smaller or larger than its original size.
- In the configuration wizard, specify the pages this enhancement will be applied to.
- Select Next: Image Size.
- Specify the image's new size.

- Select Next: Quality.
- Define a quality level. The higher the quality, the longer this enhancement will take to process.

Note: This setting only affects 8- and 24-bit images.
- Click Finish.
Rotate: This image enhancement rotates an
image to a specified orientation or by a fixed
amount.
- In the configuration wizard, specify the pages this enhancement will be applied to.
- Select Next: Image Rotation , and specify how images should be rotated:

- Automatically: Image will be rotated to ensure text runs from left to right.
- By this amount: Defines the amount (in degrees, clockwise) the image will be rotated.
- Click Finish.
Smooth: This image enhancement grows, shrinks, and/or smooths pixels.
- In the configuration wizard, specify the pages this enhancement will be applied to.
- Select Next: Grow, and specify the amount (in pixels) that will be added to each black pixel on
the image.


- Select Next: Erode, and specify the amount (in pixels) that will be removed from each black pixel
on the image. Characters may break up if you specify
too large of a value.


- Select Next: Sand and Fill, and specify the amount (in pixels) by which pits and bumps on a character
should be smoothed. This feature performs best with values between one and
five (with the exception of large type sizes).


- Select Next: Process Order, and specify the order in which Grow and Erode should occur. Processing Grow before Erode
will transform dot-matrix characters into laser printer quality characters.
Processing Erode
before Grow allows the removal
of thin lines that intersect one another.

- Click Finish.
OmniPage OCR: This image process converts text in a scanned image into text that can be edited on a computer. This process is called optical character recognition (OCR).
OCR works best on clearly typed documents. OCR is a resource-intensive
process which can be dramatically affected by poor quality images, improperly scanned images, and/or a machine's processing power and RAM
Extracted text is sent with the image to a Laserfiche repository. It will be available for text searches.
Note: OmniPage OCR is automatically installed with Laserfiche Scanning.
Maximizing OCR
Image enhancements improve the accuracy of OCR. The type of enhancements that should be used depends on the image. OmniPage OCR should be performed after image enhancements in most situations.
- Specify the pages this process will be applied to.
- Click Next: Language Selection, and select a language to determine which type of characters will be preferred.

- Click Next: Decolumnize, and select Decolumnize to remove column formatting from scanned images. If this option is not selected, columns will determine the vertical order in which text appears in a scanned document's text file.

- Click Next: Optimization Style, and specify an optimization style:

- Speed: Reduces the amount of time it takes to OCR. Generated text may be less accurate.
- Standard: Strikes a balance between speed and accuracy.
- Accuracy: Increases OCR quality. Processing time will also be increased.
- Select Next: Auto Rotate, and enable Auto Rotate to temporarily rotate images
into an orientation suitable for OCR. After OCR, the image will return to its original orientation.

- Click Finish.
Page Removal: This image process removes pages from documents based on file size or page
number. This feature is often used to remove slip-sheets, cover sheets, and blank pages.
Note: Page
removal is permanent.
- Specify the page removal method.

- Click Finish.
Previewing Image Enhancements
To preview how enhancements will affect scanned images, select Test Process.
Tip: For the best results, add a custom sample image before testing.
Modifying how an enhancement or process will perform
- Select an enhancement or process under the Image Processing node in the Scanning Explorer Pane.
- Configure the enhancement or process in the Document Properties Pane. Click Wizard to launch the configuration wizard.
Renaming an enhancement or process
- Right-click an enhancement or process under the Image Processing node in the Scanning Explorer Pane.
- Select Rename.
Deleting an enhancement or process
- Right-click an enhancement or process under the Image Processing node in the Scanning Explorer Pane.
- Select Delete.